Operation Types
- PUT IN
In the Operation Type field, select PUT IN, then under Product choose the part. In the dropdown, click Search More to list all installable parts. A little truck icon appears if the part isn’t available on‑site and must be delivered from the central warehouse.
In Location, select the warehouse from which the part will be taken. If the truck icon is shown, the part will also be shipped into this warehouse.
Click Move Parts to start the process. If shipping is required, the transfer from the central warehouse will be initiated automatically.
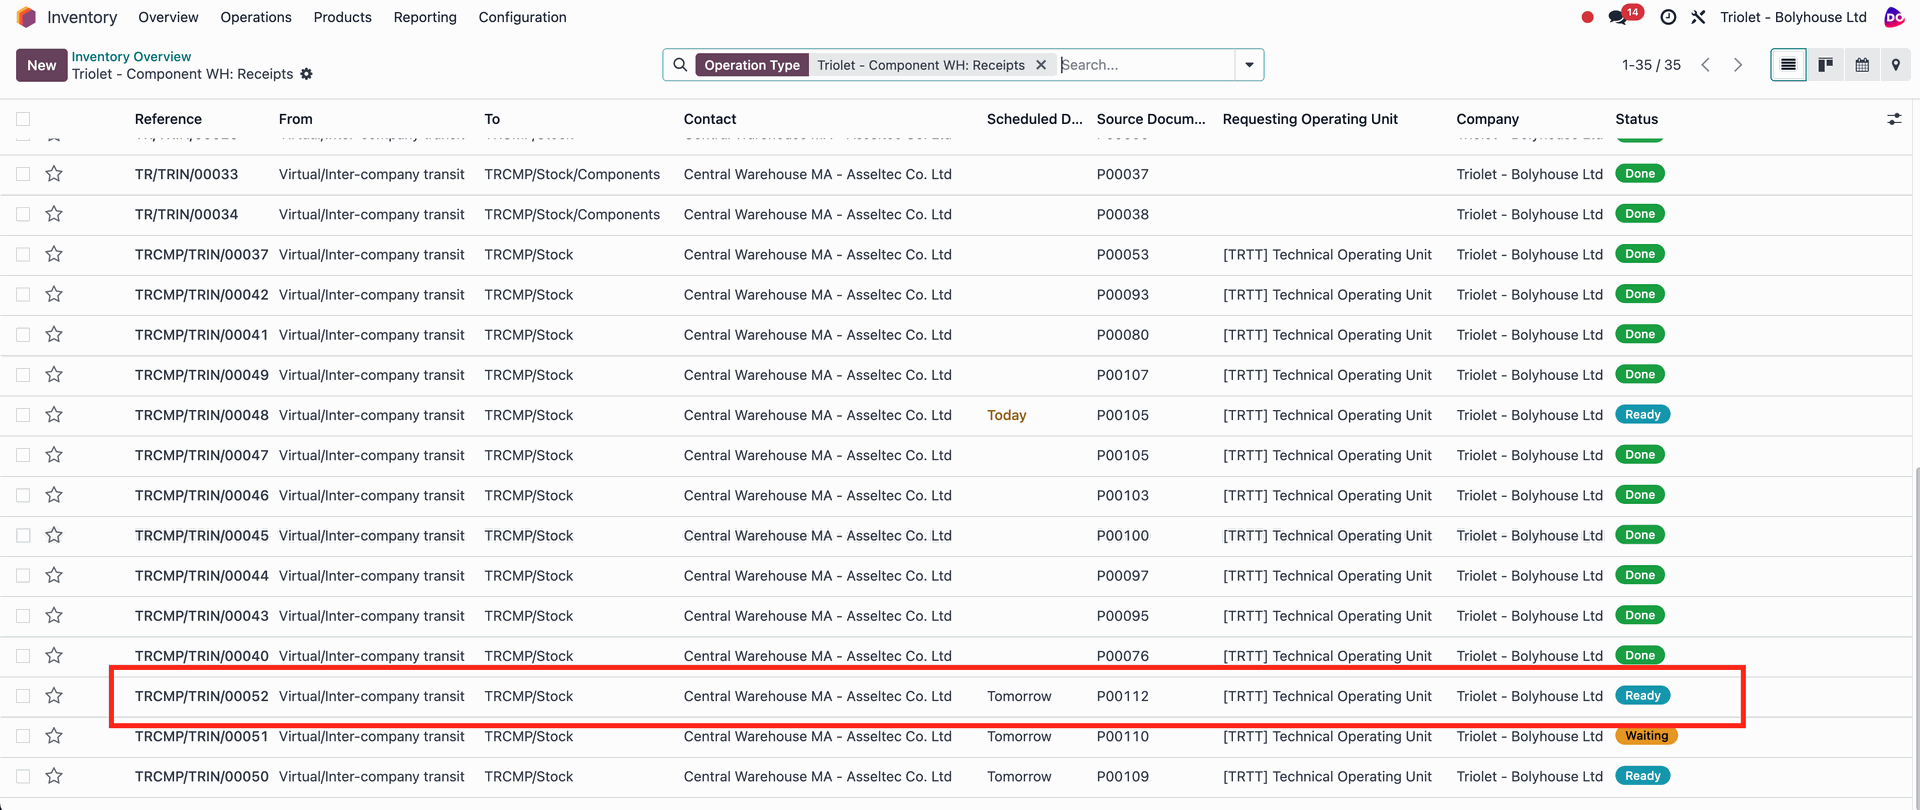
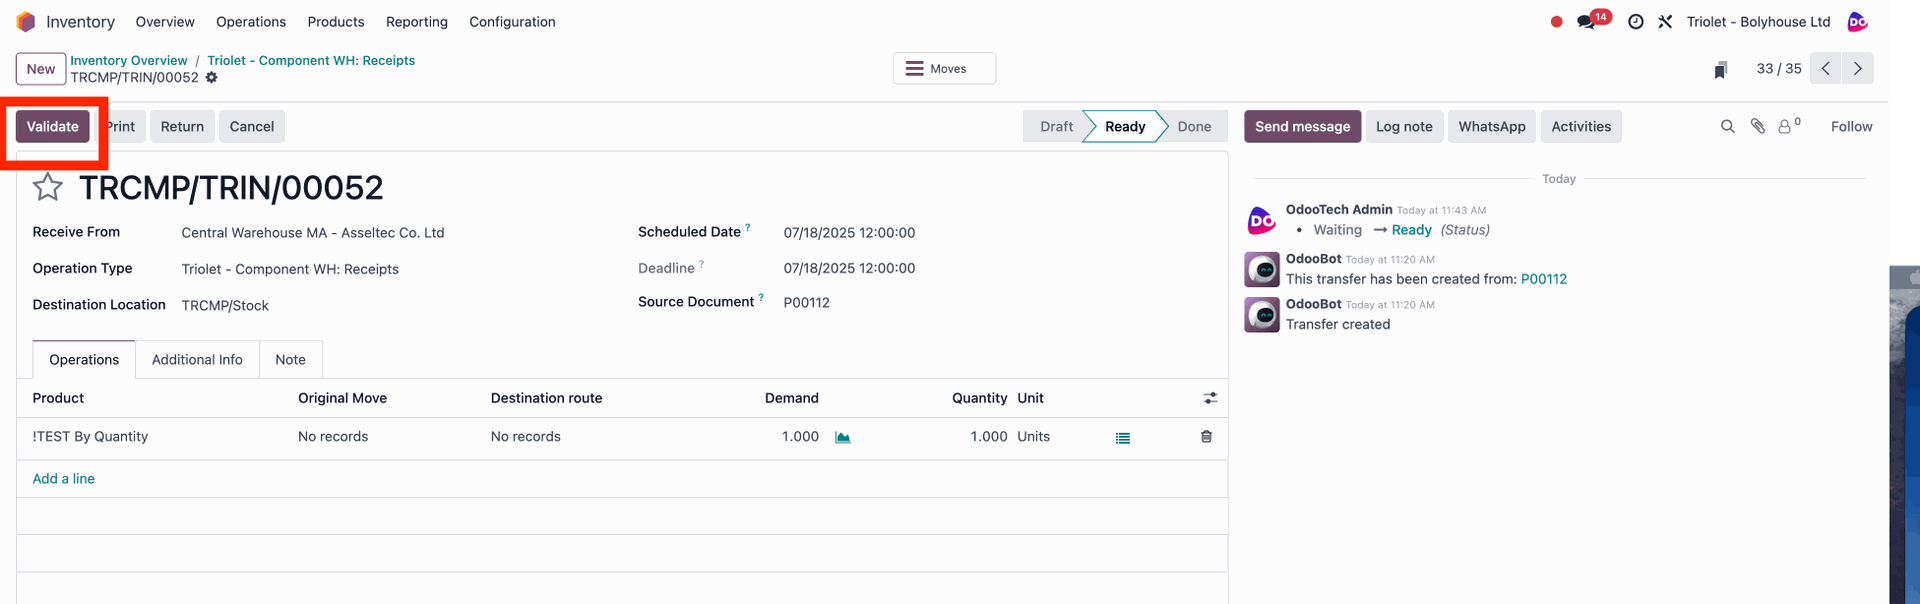
If shipping was required, the central warehouse will dispatch a shipment with the needed part. Once it arrives, go to Inventory → Receipts, find the corresponding receipt, and set the quantities recieved. The Reciept state will be Ready after the Central Warehouse sent the package, the default quantities recieved will be based on what they sent. If everything is correct click Validate.
This will change the status from Ordering to Ready to Process, allowing the installation to begin.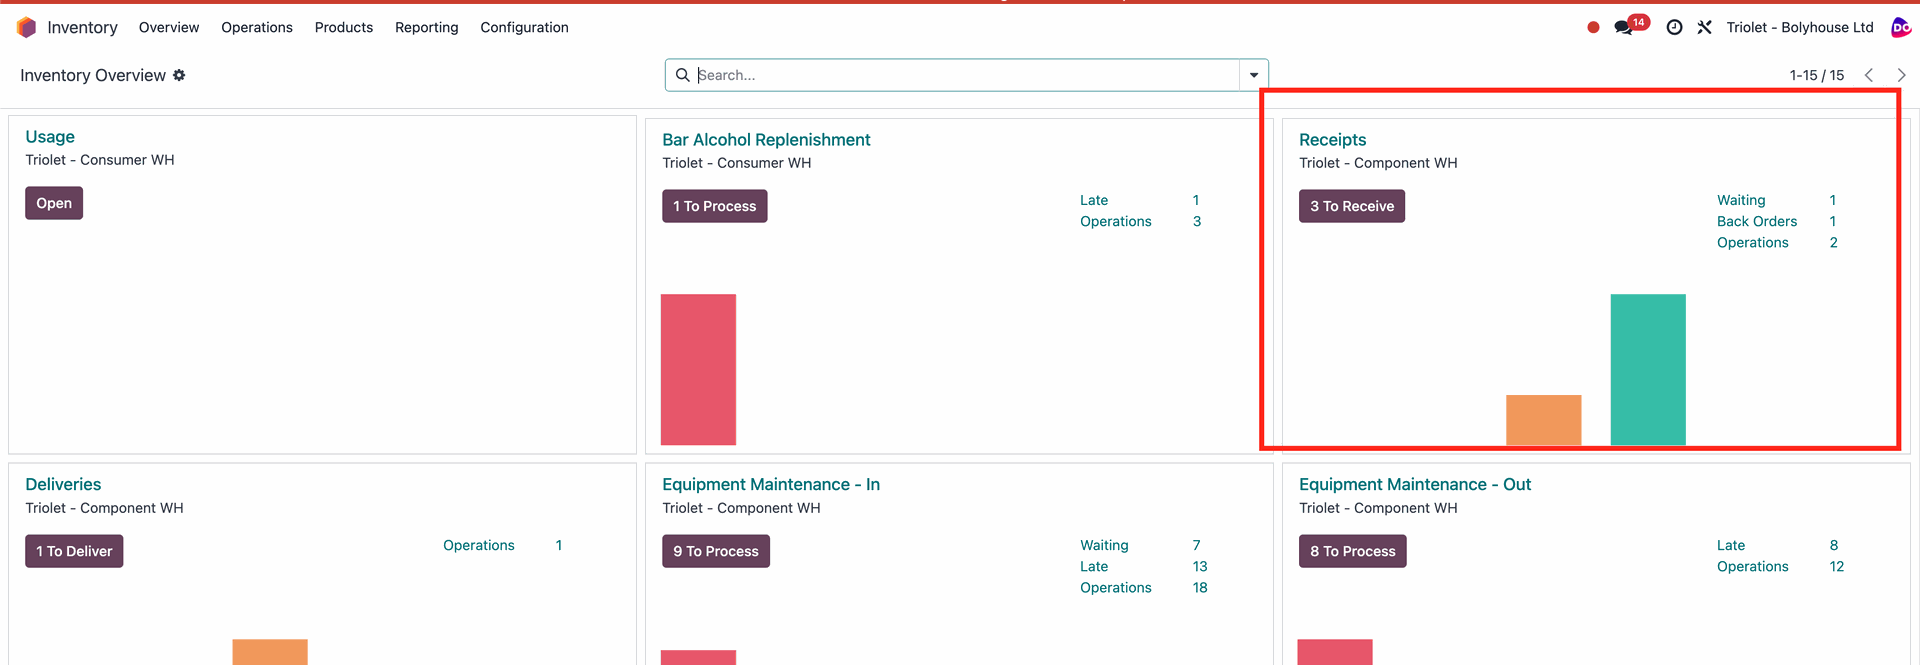
Once the status changes to Ready to Process (meaning the part has arrived or was already on‑site), the installation can begin.
Click the Operation smart button to open the initiated installation request.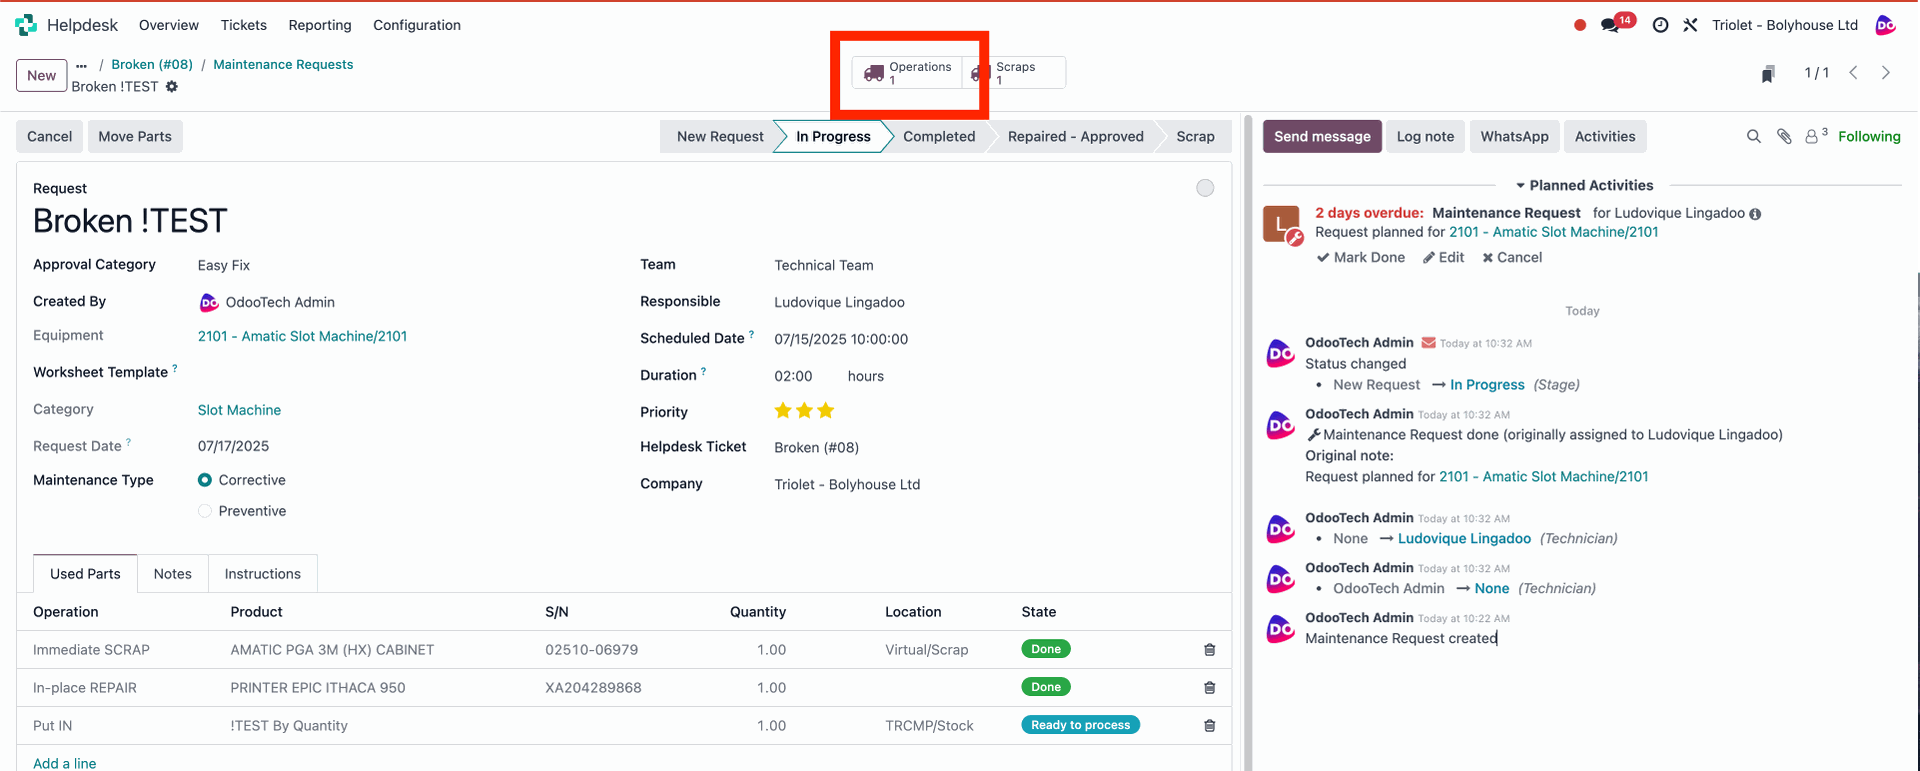

When the installation is complete, click Validate.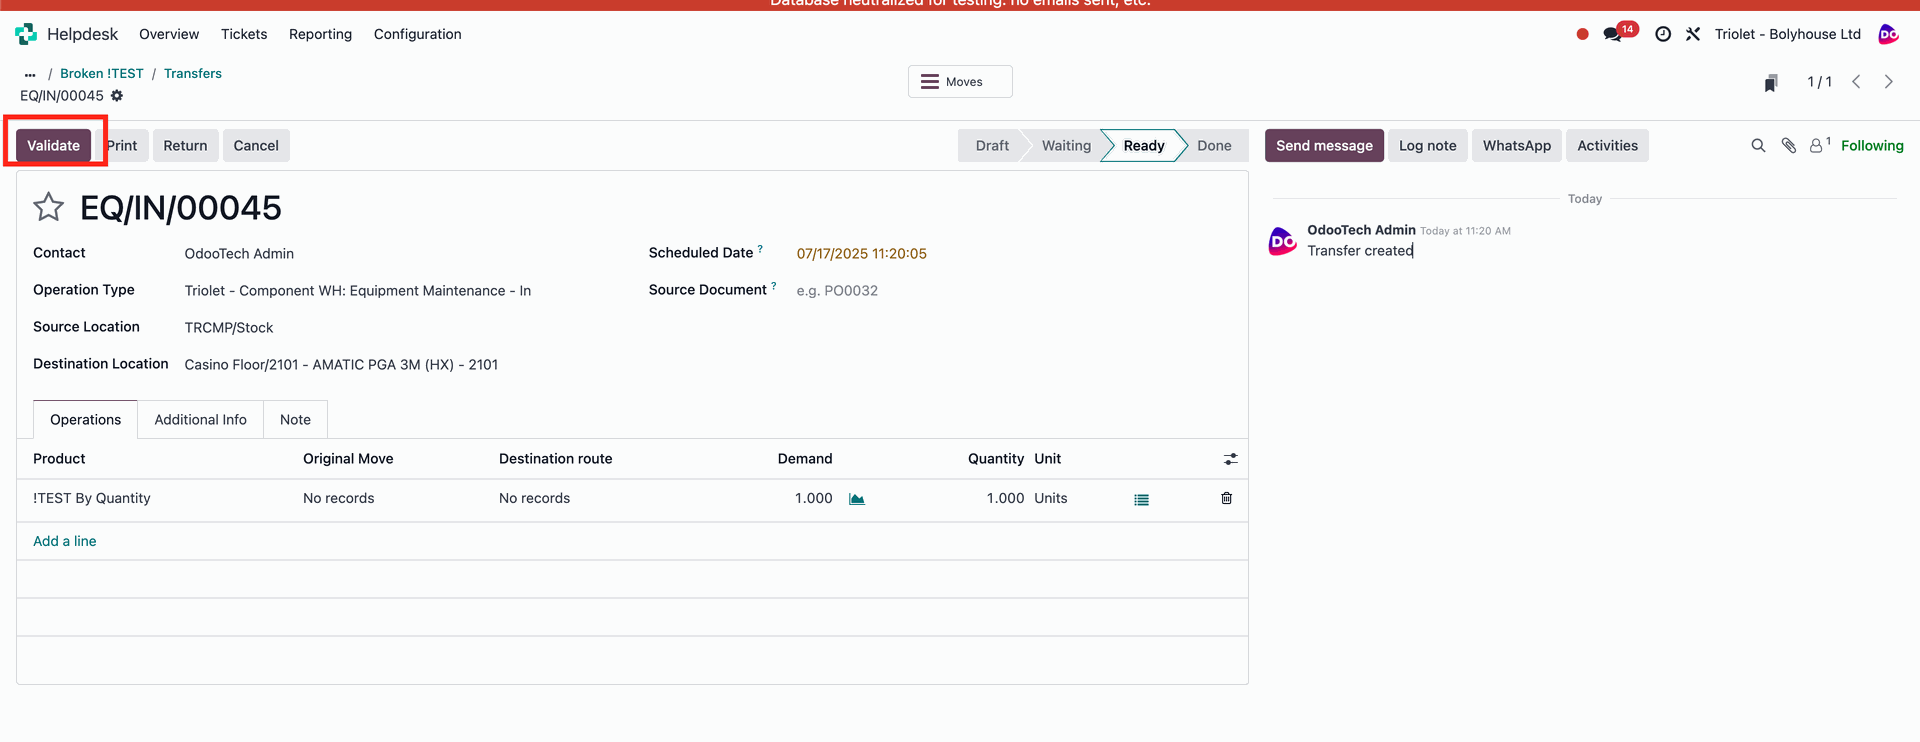
- GET OUT
In this scenario, you’ll remove the part from the machine and transfer it to the central warehouse.In the Operation Type field, select GET OUT. Select the part you wish to remove (in the dropdown, click Search More to list every part currently installed in the machine). In the Location field, choose where the part will be placed after removal—this is the location from which it will be shipped to the central warehouse.
Click the Move Parts button. The removal will be executed, and the part will then await shipment.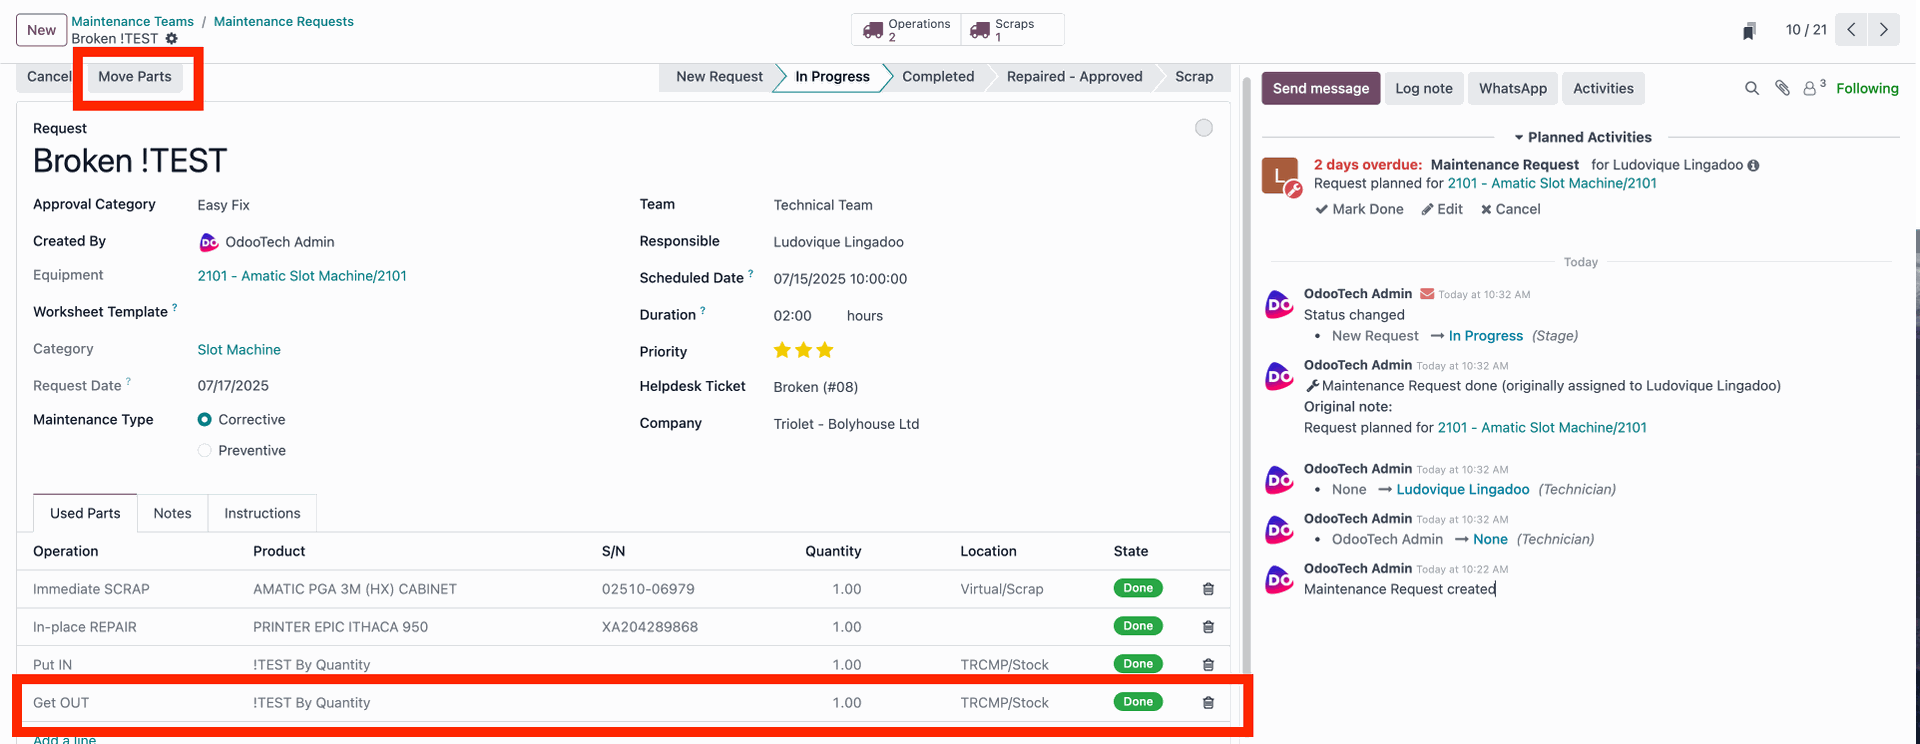
Package Dispatch:
To transfer the removed part to the central warehouse, go to Inventory → Deliveries and select the delivery you want to process.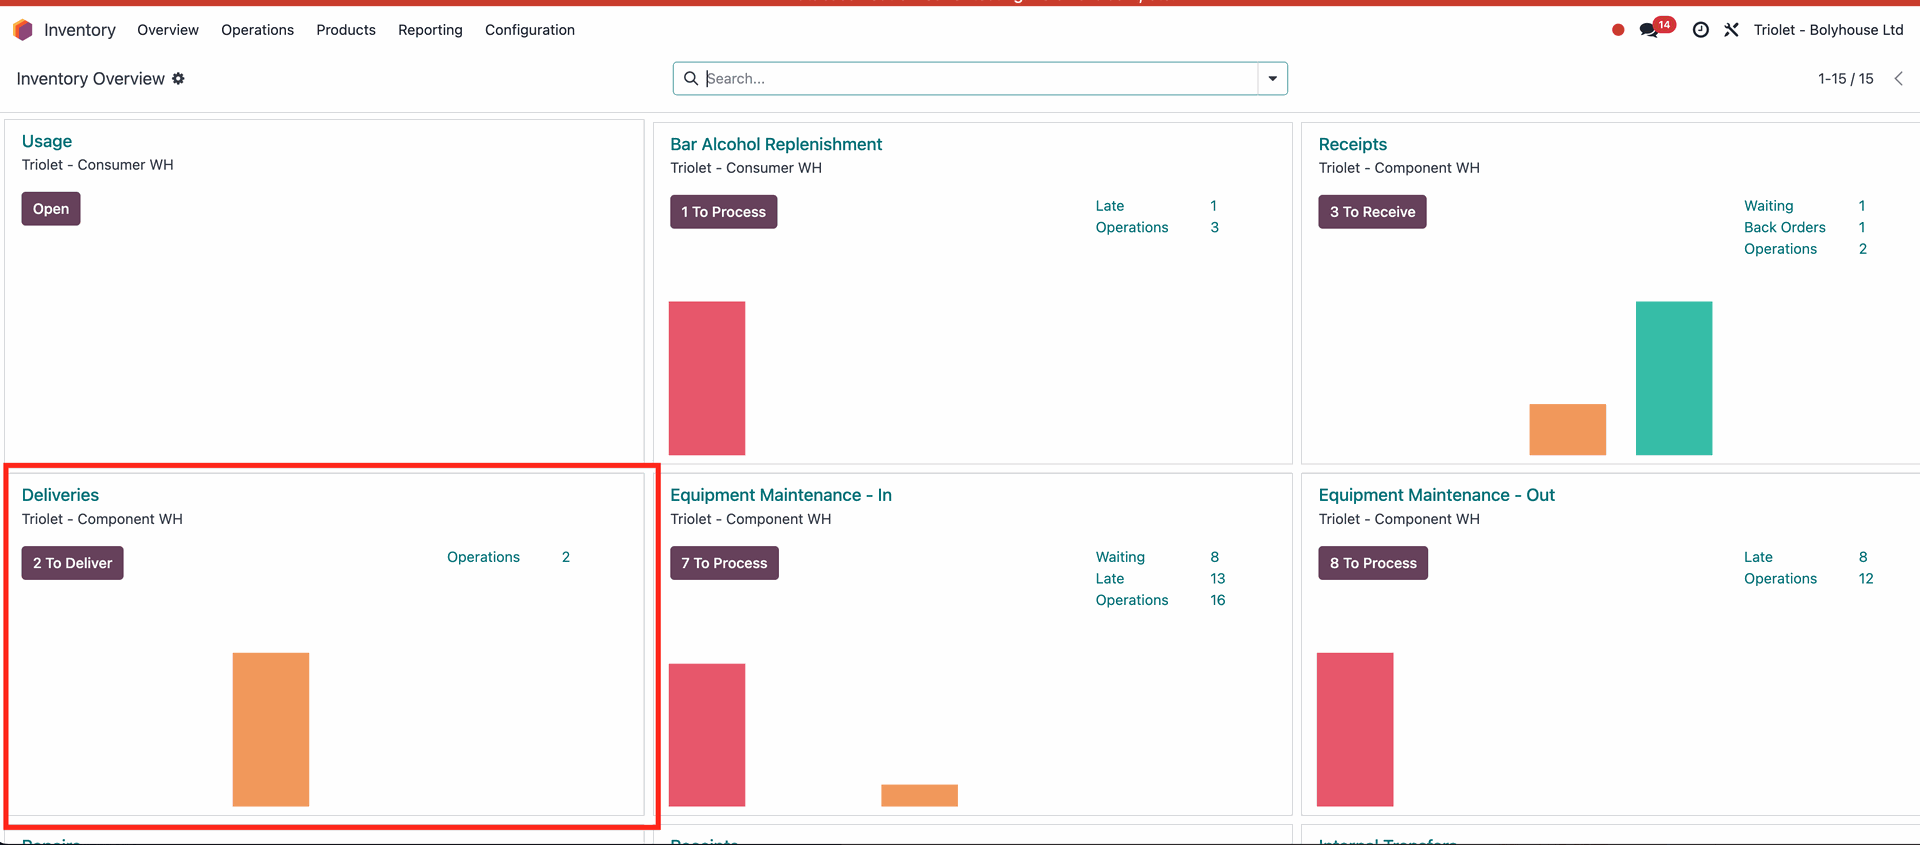
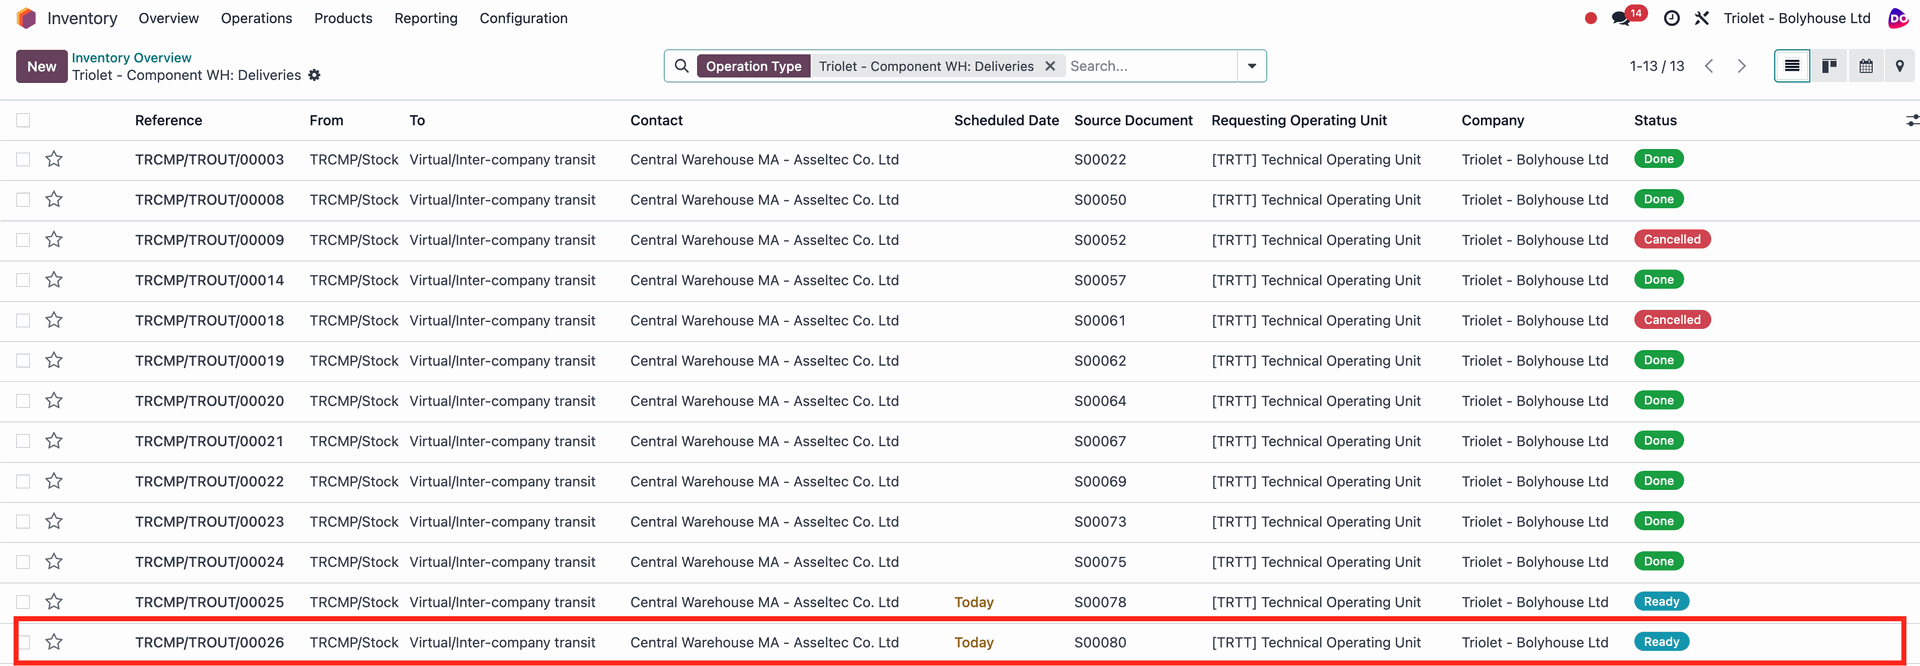
Verify that the Quantity is correct, and for serialized products ensure the proper Lot/Serial Number is selected. Initiate the shipment, then click Validate to confirm and complete the dispatch.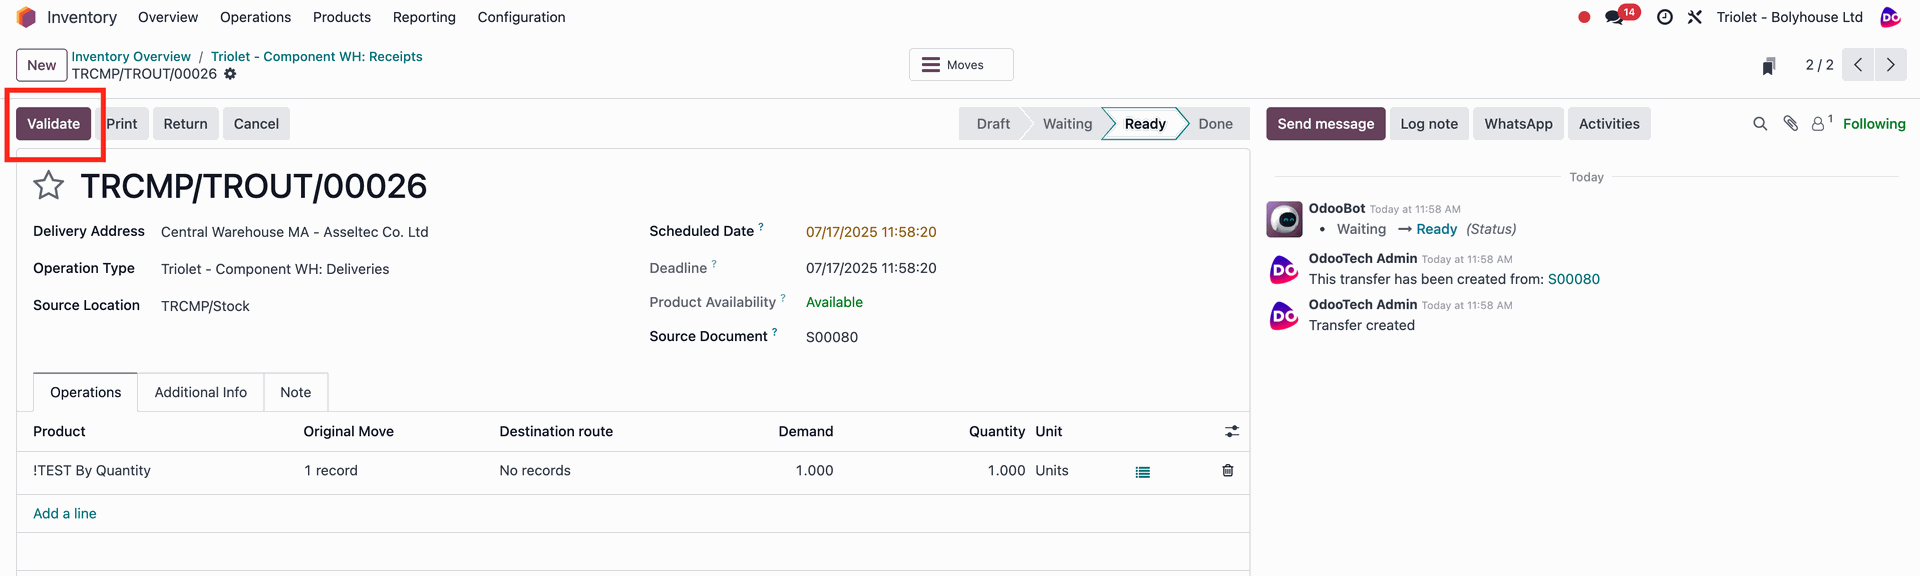
- In-Place Repair
In this case, no part removal or installation takes place; you simply perform the repair on‑site.
Set Operation Type to In‑Place Repair. Under Product, select the part you’re working on and, if needed, adjust the quantity and serial number. (In the dropdown, click Search More to list every part currently installed in the machine.)
Leave Location blank, since there’s no removal or installation. Click Move Parts—the operation will automatically switch to Done status.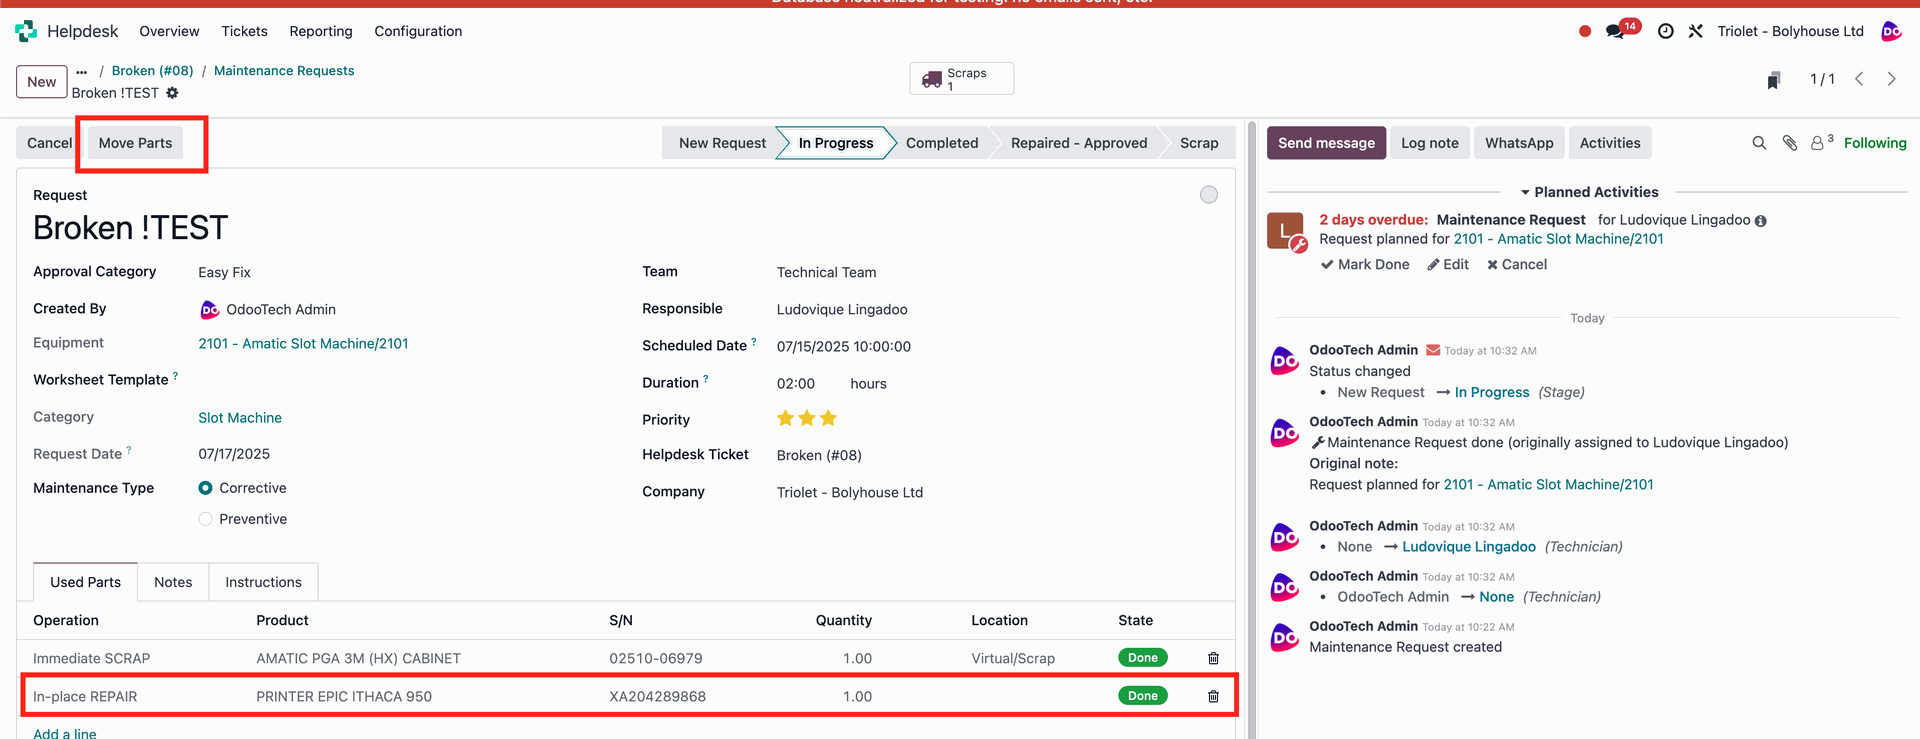
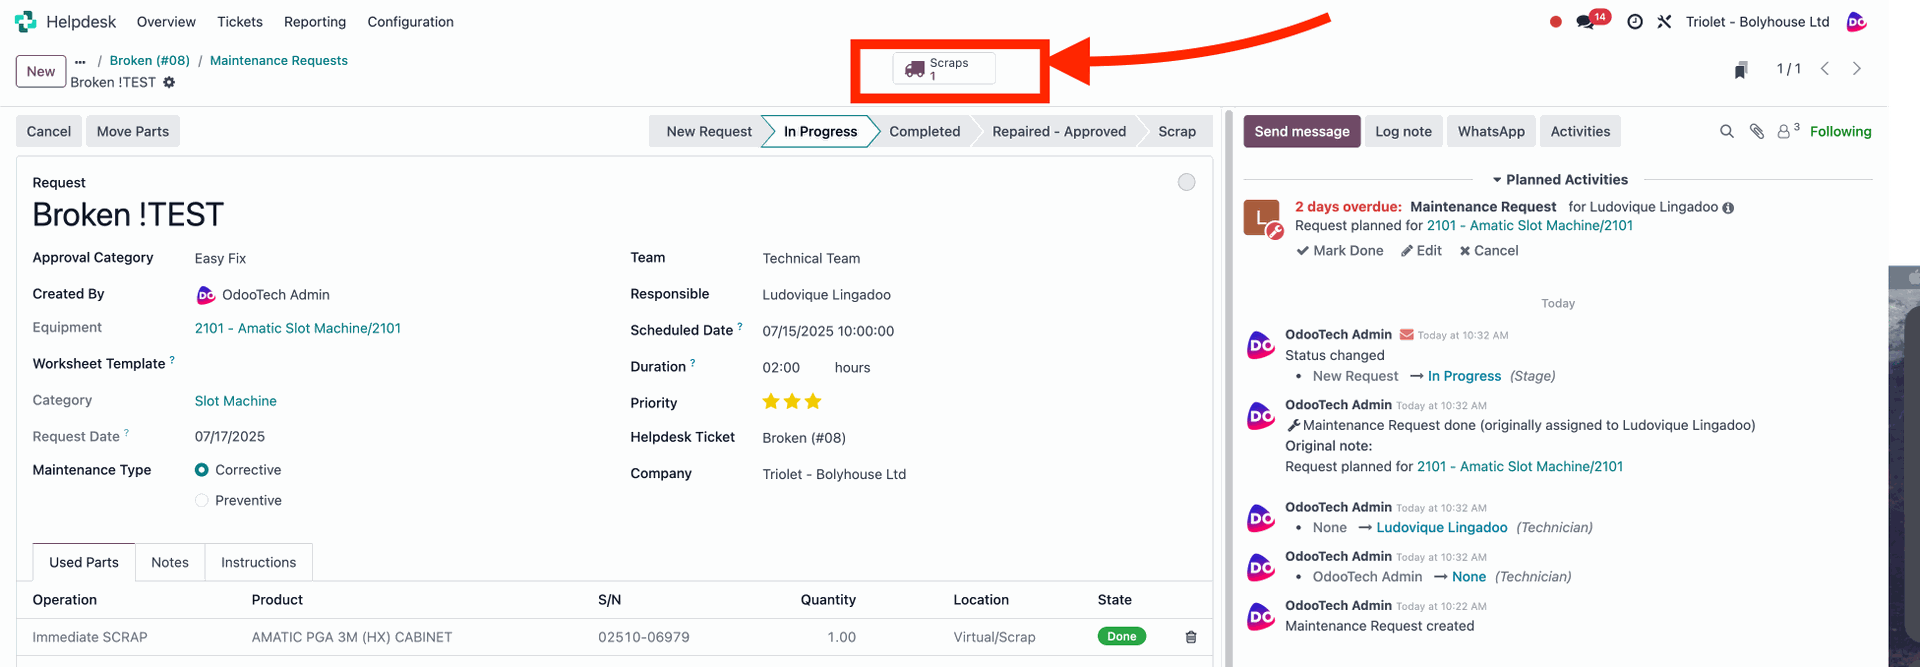
- Immediate Scrap
When you choose Immediate Scrap, the removed part is destroyed immediately after removal—for example, you remove a battery and then throw it in the trash. No transfer to the central warehouse is required.
In the Operation Type field, select Immediate Scrap, then choose the part to be scrapped. In the dropdown, click Search More to list every part currently installed in the machine. The serial number is filled in automatically; if there are multiple of the same part, you can adjust the quantity or lot number.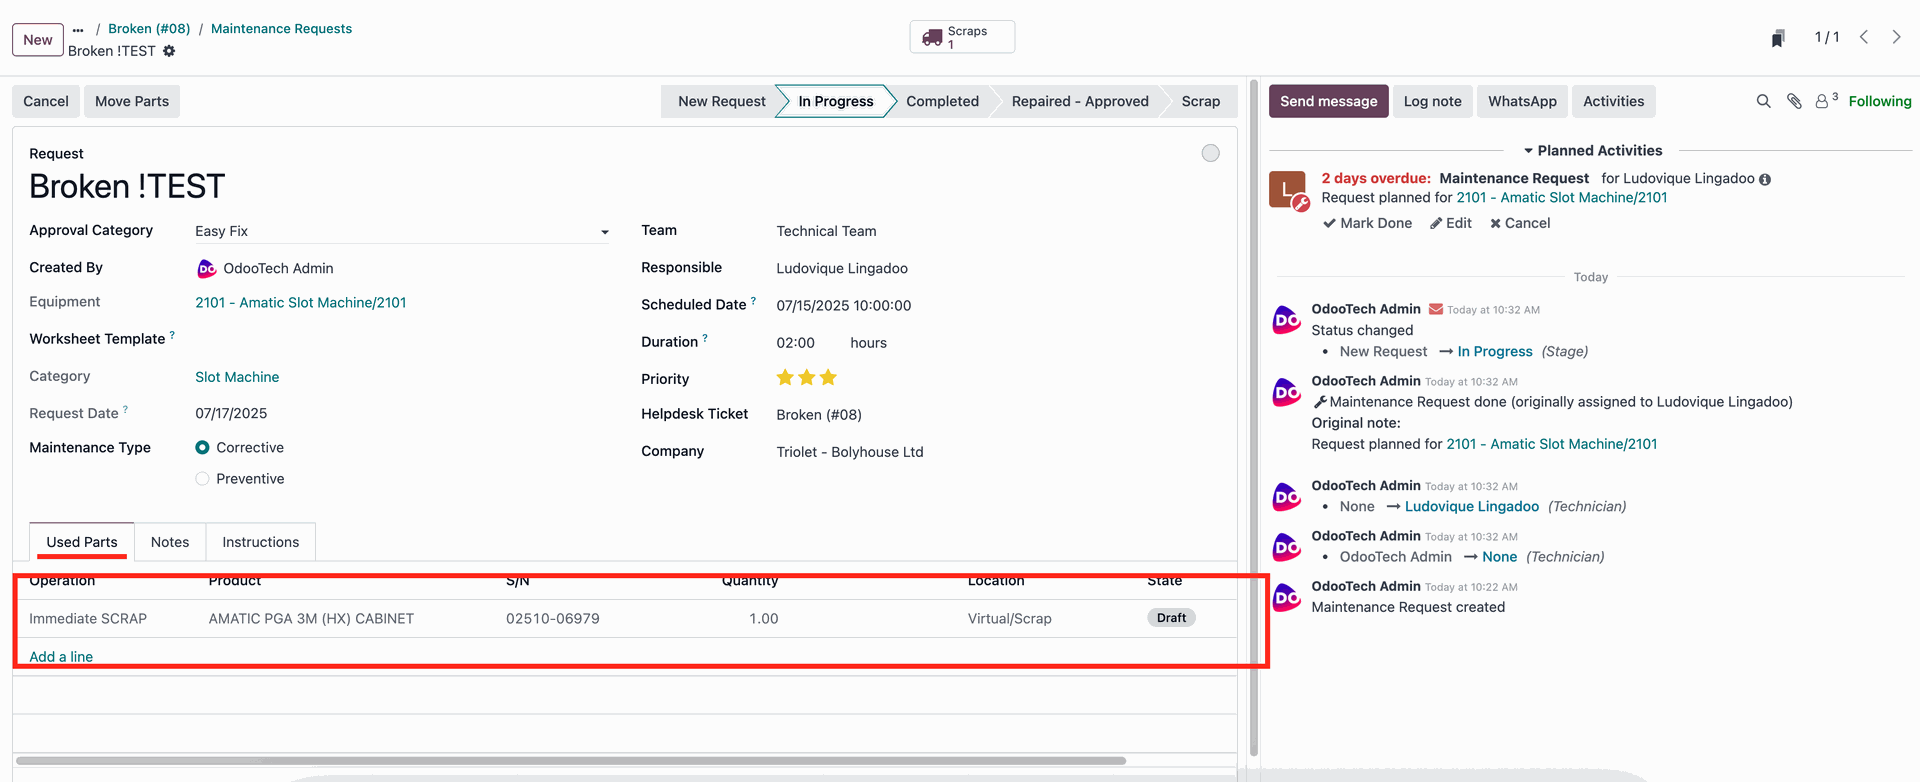
Click the Move Parts button to begin the removal. A Scraps smart button will appear at the top—click it, then select the scrap operation you just created
Once the part has been removed from the machine and destroyed, click Validate. After approval, the status will change to Done.